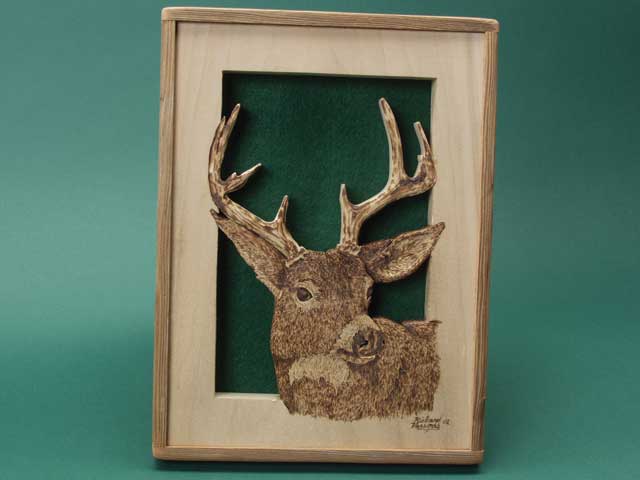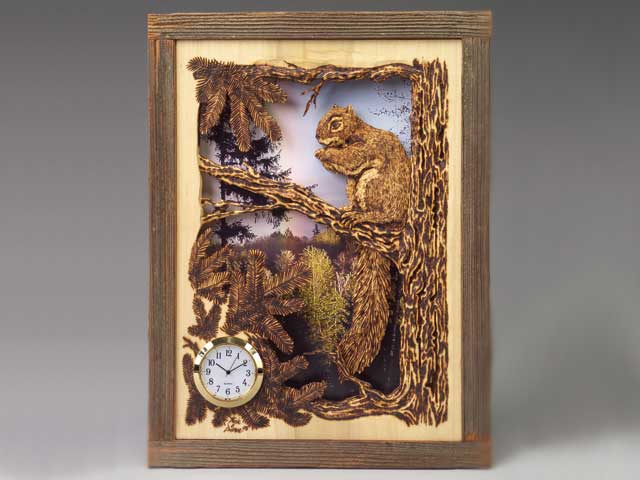
Woodworkers have used pyrography to add details to their work for years. This project combines layered scrolling, shaping, and woodburning to create a realistic outdoor scene. Instead of backing the portrait with a traditional backing, we added a photograph Dave took.
The clock is a work of art that combines Dave’s love of scrolling and Rick’s joy of shaping and burning wildlife projects in wood.
We chose poplar for this project. Poplar is technically a hardwood but it is relatively soft and easily worked for scrolling, shaping, and burning. It is available at most lumber stores. To achieve the depth needed, we used two layers of wood, cut to the same outside dimensions. The back layer is 1/2″-thick and the front layer is 1/4″-thick. The same thicknesses of birch or maple plywood can be used instead of the poplar. Plywood is stronger, but has very different shaping and burning characteristics. Both layers should be the same type of wood.


Hopefully the project will spark your imagination and enthusiasm in utilizing the techniques on future projects.
A Note on Burning
The burning on this project adds a lot of detail, depth, and shape to the completed project.
We use two tips while burning this project; a knife-blade tip is used for fine lines, hair, and needles. A calligraphy tip is used for the bark and shading.
Poplar burns nicely and is easy to work with. Practice on a scrap piece to get comfortable with different shading techniques. When burning the overall piece, use care and do not try to work too fast. Let the burner do the work—don’t force it. Burning the lines from top to bottom makes it easier to control the depth and shading of the burning. The longer you hold the pen in place, the darker the wood will burn. A light touch is preferable to a heavy pressure. You can always go over the same spot multiple times to make it darker.
-

- Step 1: Prepare the blanks for stack cutting. Firmly attach the 1?4"-thick layer to the 1?2"-thick layer, using masking tape on the edges. Attach the pattern to the 1?4" top layer, using repositionable spray adhesive. Make sure your saw blade is square to your table by cutting a piece of scrap and checking the cut using a square.

-

- Step 2: Drill blade-entry holes with the #60 twist bit, which accommodates both of the scroll saw blades used in this project. To decide where to place the blade-entry holes, visualize which part of the pattern will be in the foreground and which part will be in the background. Use a highlighter to lightly spot the holes for the cuts common to both layers.

-

- Step 3: Make the cuts common to both layers. Start with the smaller cuts in the squirrel—the eye, ears, and accent lines in the body—using a #2 reverse-double-skip-tooth blade. Cut carefully because the wood is 3?4"-thick. After the accent lines are cut, switch to a #5 reverse-double-skip-tooth blade to cut the lines around the outside of the squirrel. Then saw the lines along the perimeter of the pattern as well as along the length of the horizontal tree branch.

-

- Step 4: Drill a hole for the small clock movement. The size of the hole varies—for the insert in this project, drill a 1 1?4"-diameter hole. Match the diameter of the drilled hole to the size of your clock insert. Line the hole up, using the centering mark in the lower-left side of the pattern. Drill through both layers to an overall depth of 9?16", but don’t drill the whole way through both pieces.

-

- Step 5: Separate the two pieces of wood, but leave the pattern attached to the top layer. Follow the rest of the pattern, cutting the needles on the tree limbs at the top and lower-left of the pattern. Finally, cut off the large middle branch at the tree trunk and at the left edge of the pattern, removing the entire squirrel from the top layer. This will leave the squirrel and the center limb deeper in the scene on the thicker back piece when the two halves are joined again, creating the 3D effect. With all the cuts finished on the top layer, remove the remains of the pattern, and lightly sand the surface to prepare it for burning. This is only to smooth the surface and lightly round off the various edges.

-

- Step 6: Place the top layer over the bottom layer, and mark the areas that will be behind the trees needles. Sketch in the lines to be cut using the red lines on the pattern as a guide. Alternately, use graphite paper to trace the red lines onto the second layer. Use the drilled holes as a guide, and cut out those sections to create depth behind the tree needles. Leave enough area on the lower-left corner to mount the clock insert.

-

- Step 7: Shape the big limb on the back layer. We use a rotary tool with a sanding drum. It is possible to shape the project by hand sanding, but it will take longer. If using a rotary tool, start with a 1?2" or 1?4"-diameter sanding drum. Work on the reverse side first. Sand and shape the limb so that it will slightly stand off from the background photo, which will add depth to the overall look. Be careful not to remove the wood too quickly, or you may break the more fragile scrolled pieces.

-

- Step 8: Carefully shape the twig. Use the sanding drum to round over all of the edges, so the piece will look as if it is suspended in air after it is mounted.

-

- Step 9: Shape the squirrel and limb. Place the back layer on the table the way you will be viewing it, with the squirrel on the right hand side. Carefully shape the squirrel, using the straight rotary burr. Think in three dimensions when shaping the limb and squirrel, and be aware of which parts are further back and which are closer to you.

-

- Step 10: Shape the tail. Since it has so many detailed cuts, support it with your fingers so you don’t break it. Accent some of the saw cuts to give your project more depth.

-

- Step 11: Round over and detail the top layer. Use the sanding drums since they are a bit gentler when removing material.

-

- Step 12: Accent the trunk of the tree and the lines scrolled in it, using the sanding drum. Do not shape the needles or twigs very much because it is easy to break them off; the burning will accent them to a large degree. Assemble the two halves from time to time to make sure the overall look meets your satisfaction.

-

- Step 13: Burn the trunk and limbs of the tree (on both layers) with the calligraphy tip to accent the depressions and saw cuts. Make sure your lines and shadings are random——it looks more natural that way.

-

- Step 14: Use the knife-blade tip to burn in the pine needles. Look at an evergreen tree to get ideas. The needles radiate away from a common twig line. Continue all around the edge of the wood on each needle.

-

- Step 15: Draw in random long lines for the squirrel’s tail, using the knife tip. Accent the saw cuts using the same tip.

-

- Step 16: Burn in the hair on the squirrel’s body. Use a lighter touch and make short lines with the burner. Spread the lines out a little bit more, and allow the natural color of the wood to show through.

-

- Step 17: Add a little extra shading for the shadows around the legs, paws, and neck.

-

- Step 18: Continue all the various textures and lines around the edges of the wood. This brings out depth in the overall completed piece and is more uniform to the eye.

-

- Step 19: Glue and clamp the two layers together. Make sure they are aligned properly so that the frame will fit flush on the outside edges. When dry, add some finishing touches with your woodburner to blend the two layers together.

-

- Step 19: Glue and clamp the two layers together. Make sure they are aligned properly so that the frame will fit flush on the outside edges. When dry, add some finishing touches with your woodburner to blend the two layers together.

-

- Step 21: Position and trim your photo of choice for the background. Glue it to a piece of solid cardstock, foam board, or equivalent material, and glue it to the back of the completed piece. Add a saw-tooth hanger and the clock.